


Navigating Windows 11 can be a breeze, but the sign-in process might feel cumbersome. Many users seek ways to streamline their login experience. Removing the sign-in option can simplify this process significantly.
This guide explains how to remove sign in option in Windows 11 using simple methods suitable for both beginners and experienced users.
Windows 11 requires a Microsoft account initially, but you can switch to a local account. This flexibility allows you to manage your login preferences effectively.
Auto-login is another feature that can enhance your experience. By enabling it, you can skip the sign-in process altogether.
Security is important, so consider the implications of removing sign-in options. This guide will help you balance convenience and security.
Table of Contents
Introduction to Sign In Options
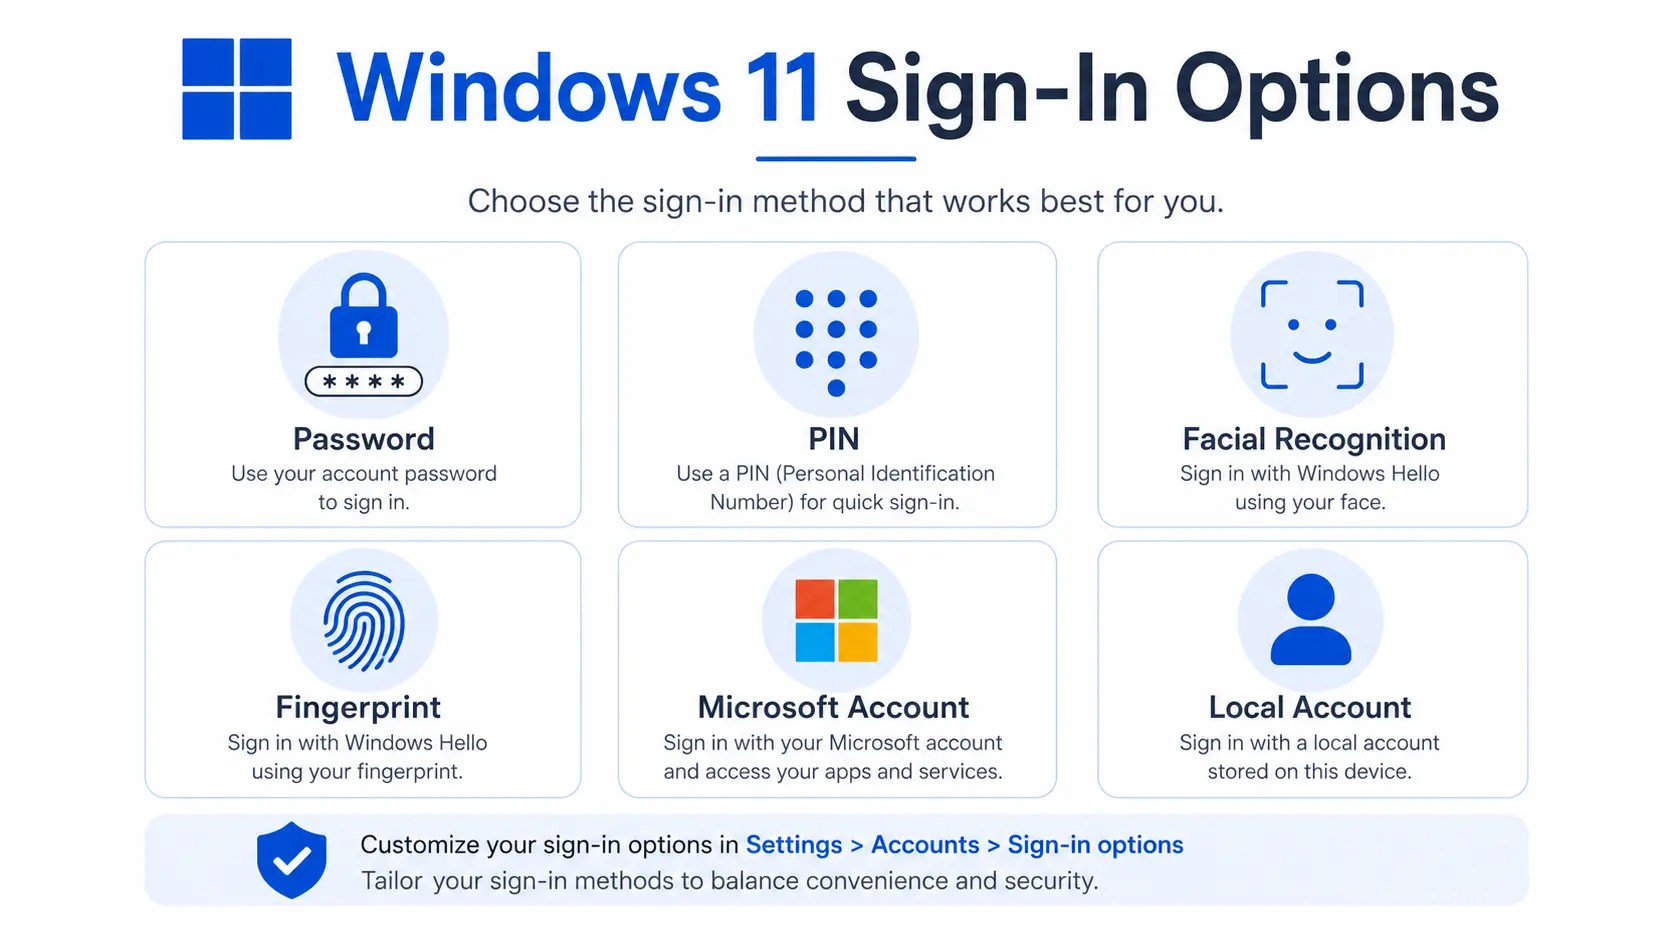
Windows 11 provides several sign-in options to secure your computer. These options include passwords, PINs, and biometric methods like facial recognition and fingerprint scans. Each method serves a specific purpose and offers different levels of security and convenience.
The default setup requires linking a Microsoft account during installation. This linkage allows seamless access to services like OneDrive and Microsoft Store. However, users can later switch to a local account to reduce reliance on Microsoft services.
Here’s a quick list of available sign-in methods:
- Passwords for account security
- PINs for quicker access
- Biometric sign-in for supported devices
Customizing your sign-in options can enhance the user experience. For personal devices, you might opt for simpler methods, while shared devices might need stricter security. Windows 11’s flexibility in managing these options is beneficial for tailoring them to your personal needs.
Default Sign In Practices in Windows 11
Out of the box, Windows 11 encourages linking your device to a Microsoft account. This link allows you to synchronize settings across devices and access cloud-based services. However, not everyone finds this appealing or necessary.
Windows also includes local account options that don’t require Microsoft account integration. Many users appreciate this feature for its privacy and simplicity. You can switch between these accounts by accessing the ‘Accounts’ section in the Settings app.
Default sign-in options typically include:
- Microsoft Account with cloud features
- Local Account for simplicity and privacy
These practices help Windows balance security and user convenience. Understanding these defaults empowers you to make informed changes according to your needs.
Pros and Cons of Removing Sign In Options
Removing sign-in options may offer several benefits, yet it also introduces potential drawbacks. On the positive side, bypassing the sign-in process can save time. It makes the boot-up process faster, which is great for personal devices where security concerns might be minimal.
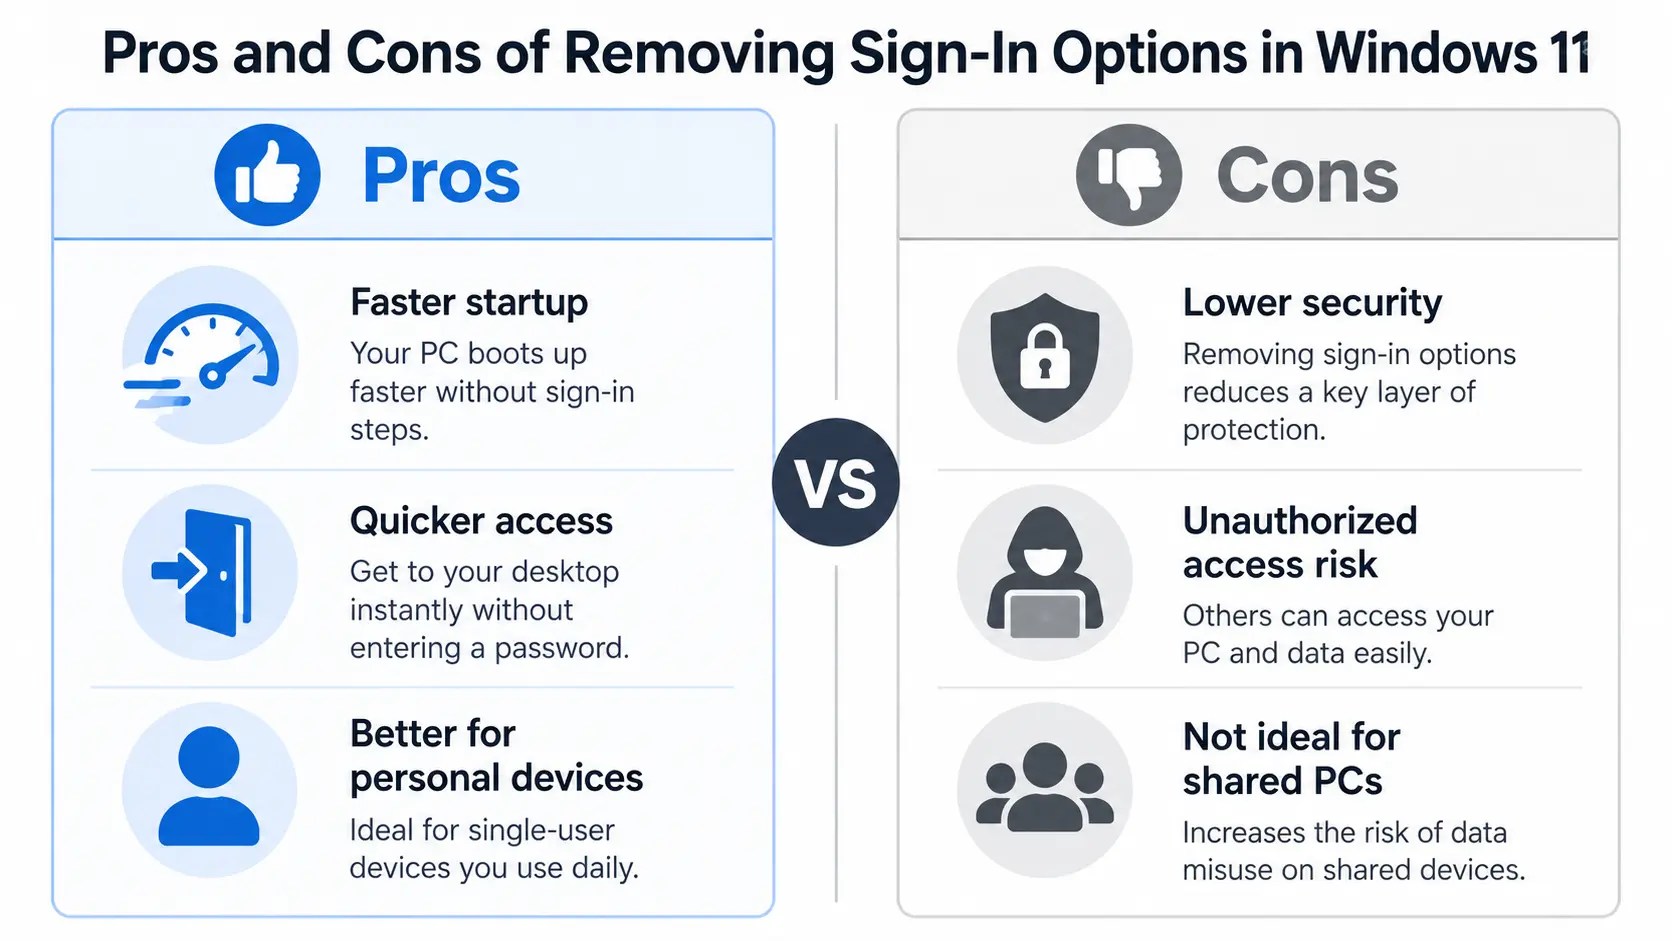
On the downside, not signing in can reduce your device’s security. Without proper login protocols, unauthorized access becomes easier. This reduction in security is critical, especially for devices accessing sensitive information.
Consider these points:
- Pros:
- Faster startup times
- Easier access for personal use
- Cons:
- Lowered security
- Risk of unauthorized access
Think carefully about these factors before deciding to remove sign-in options. You’ll need to find the right balance between convenience and ensuring your device remains secure.
How to Remove Sign In Option in Windows 11
To understand how to remove sign in option in Windows 11, begin with the Accounts section of the Settings app. From there, you can switch account types, adjust sign-in requirements, or configure automatic login.
Here’s how to start:
- Open the Start menu.
- Navigate to ‘Settings.’
- Select ‘Accounts.’
These steps guide you through accessing relevant settings to make the necessary changes. With the following sections, you’ll learn specific methods to bypass or turn off sign-ins both for Microsoft and local accounts.
Bypassing Microsoft Sign In
Bypassing the Microsoft sign-in can simplify your Windows 11 user experience. If you prefer not to use a Microsoft account, switching to a local account is a straightforward process. This switch allows you to log in without entering a Microsoft password.
To remove Microsoft account sign-in, follow these steps:
- Go to ‘Settings.’
- Select ‘Accounts’ and choose ‘Your Info.’
- Select ‘Sign in with a local account instead.’
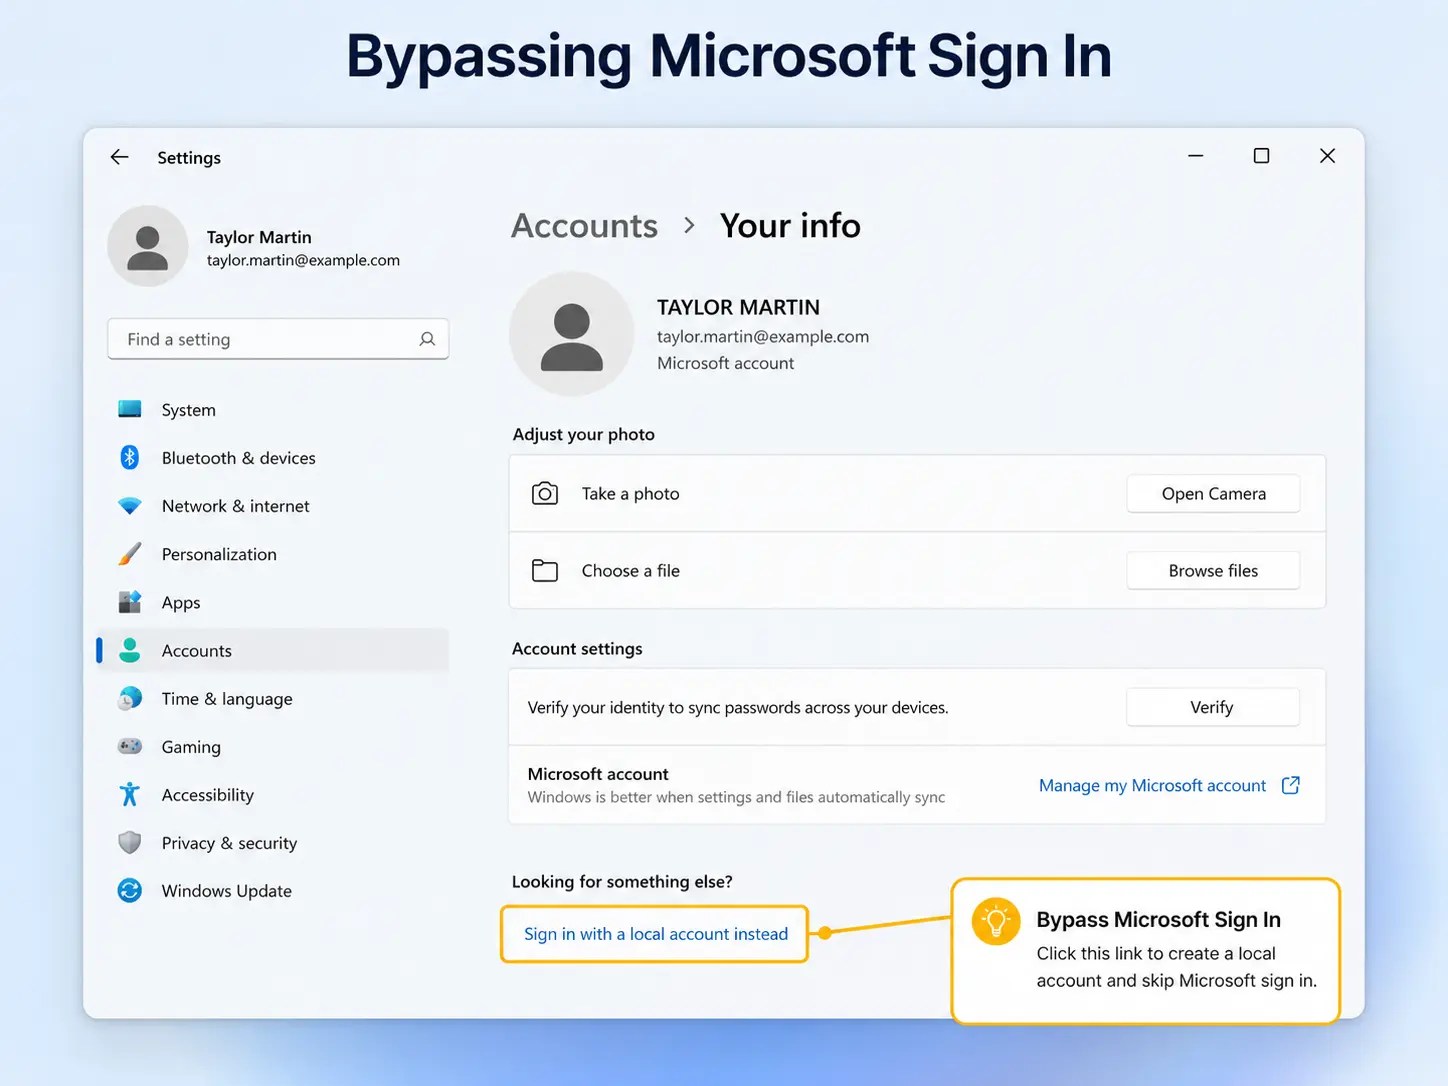
This approach retains your existing settings while removing Microsoft account dependencies. Keep in mind, though, doing this can limit access to certain Microsoft services like cloud sync and OneDrive.
For some users, privacy outweighs the benefits of a Microsoft account. Locally managed accounts provide more direct control over your personal data. If opting for this, ensure that you weigh the advantages against potential downsides like reduced feature access.
Turning Off Sign In for Local Accounts
Turning off sign-in requirements for local accounts is a practical choice for personal devices. This setup eliminates the need to enter a password every time you log in.
To do this, consider the following method:
- Open ‘Settings.’
- Navigate to ‘Accounts’ and choose ‘Sign-in options.’
- Set ‘Require sign-in’ to ‘Never.’
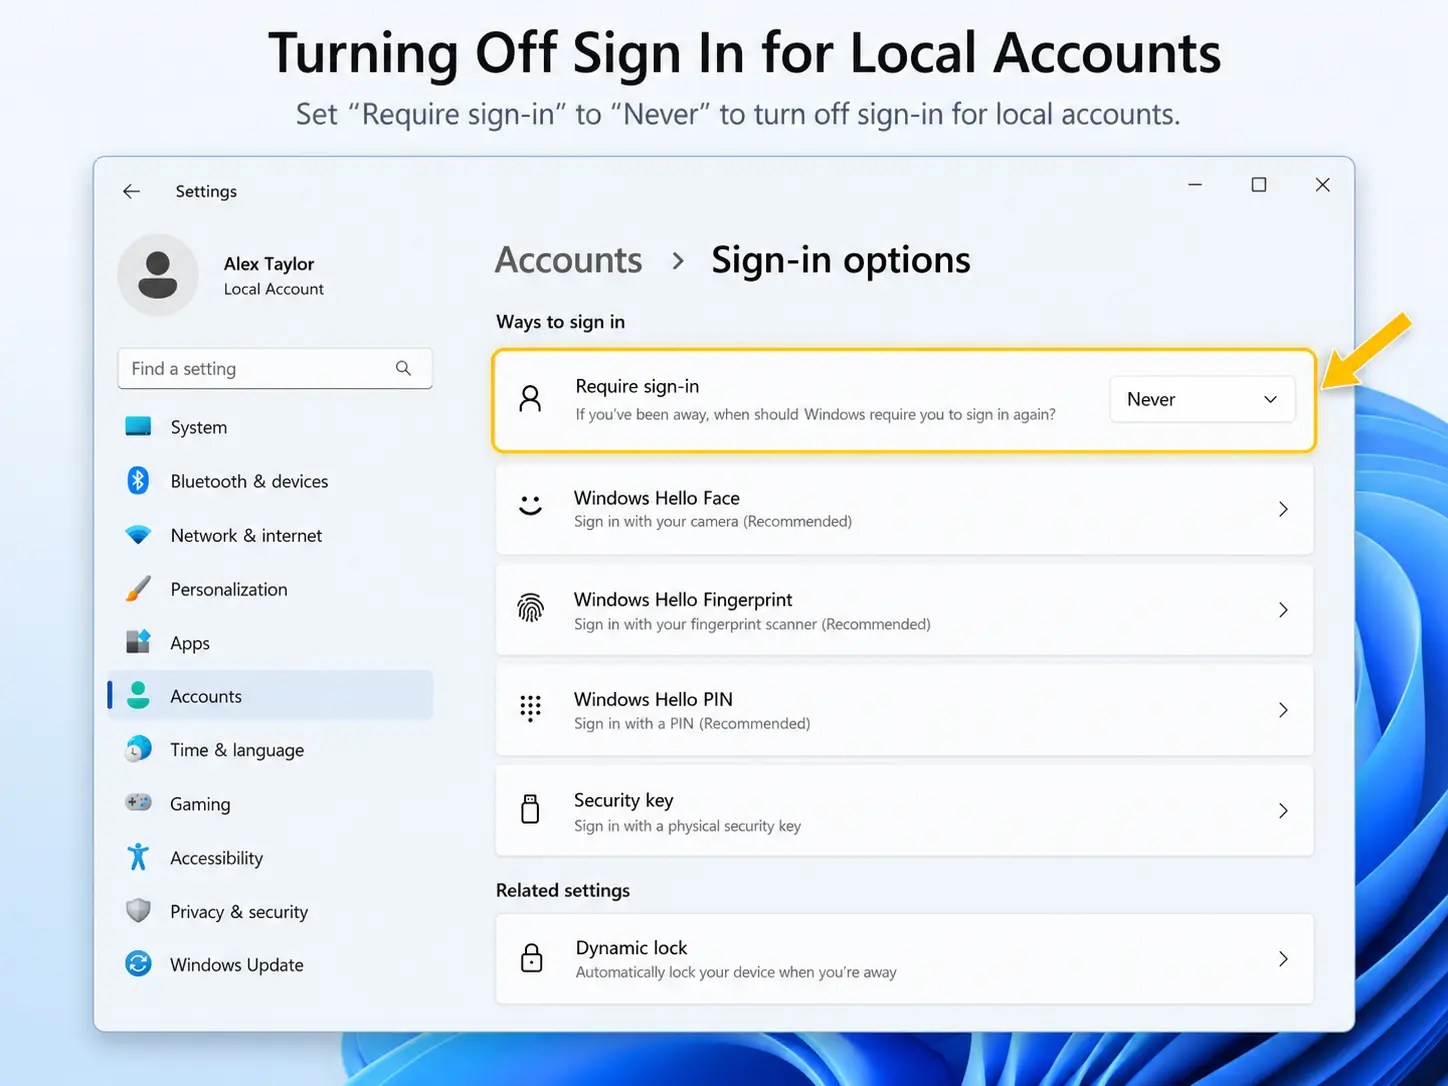
This adjustment allows for seamless access without compromising too much security for personal use. Yet, it’s crucial to ensure adequate security through other means, like ensuring your device is physically secure.
For shared devices or those in high-risk environments, this option may not be advisable. Consider all implications and only proceed if the device remains in a secure and trusted location.
How to Skip Signing In Windows 11
For users researching how to remove sign in option in Windows 11, automatic login is the most direct way to reach the desktop without entering credentials at every startup. Windows also provides several related settings that can make sign-in less frequent.
Here’s a quick overview:
- Adjust User Account Control (UAC) settings.
- Set up auto-login for specific user accounts.
- Explore advanced options like Registry tweaks for customization.
Each method offers different levels of convenience and security. Choose one that aligns with your personal or organizational needs.
Configuring User Account Control Settings
User Account Control (UAC) settings are pivotal in managing sign-in preferences. Configuring these settings helps streamline the login process. By modifying UAC, you can reduce frequent prompts that ask for account credentials. Here’s how to customize UAC settings:
- Open ‘Control Panel.’
- Navigate to ‘User Accounts.’
- Click ‘Change User Account Control settings.’
Adjust the slider to your desired level. Lower settings mean fewer interruptions but be cautious about security risks. UAC also helps prevent unauthorized changes, so altering these settings should be well-considered. Always ensure the changes suit your security needs and usage patterns, balancing ease of use with safety.
Setting Up Auto Login
Configuring auto-login can significantly improve the startup experience. This setup ensures that Windows 11 starts directly on the desktop without asking for a password. Follow these steps to enable auto-login:
- Press Windows + R to open the Run dialog.
- Type netplwiz and press Enter.
- Uncheck ‘Users must enter a username and password to use this computer.’
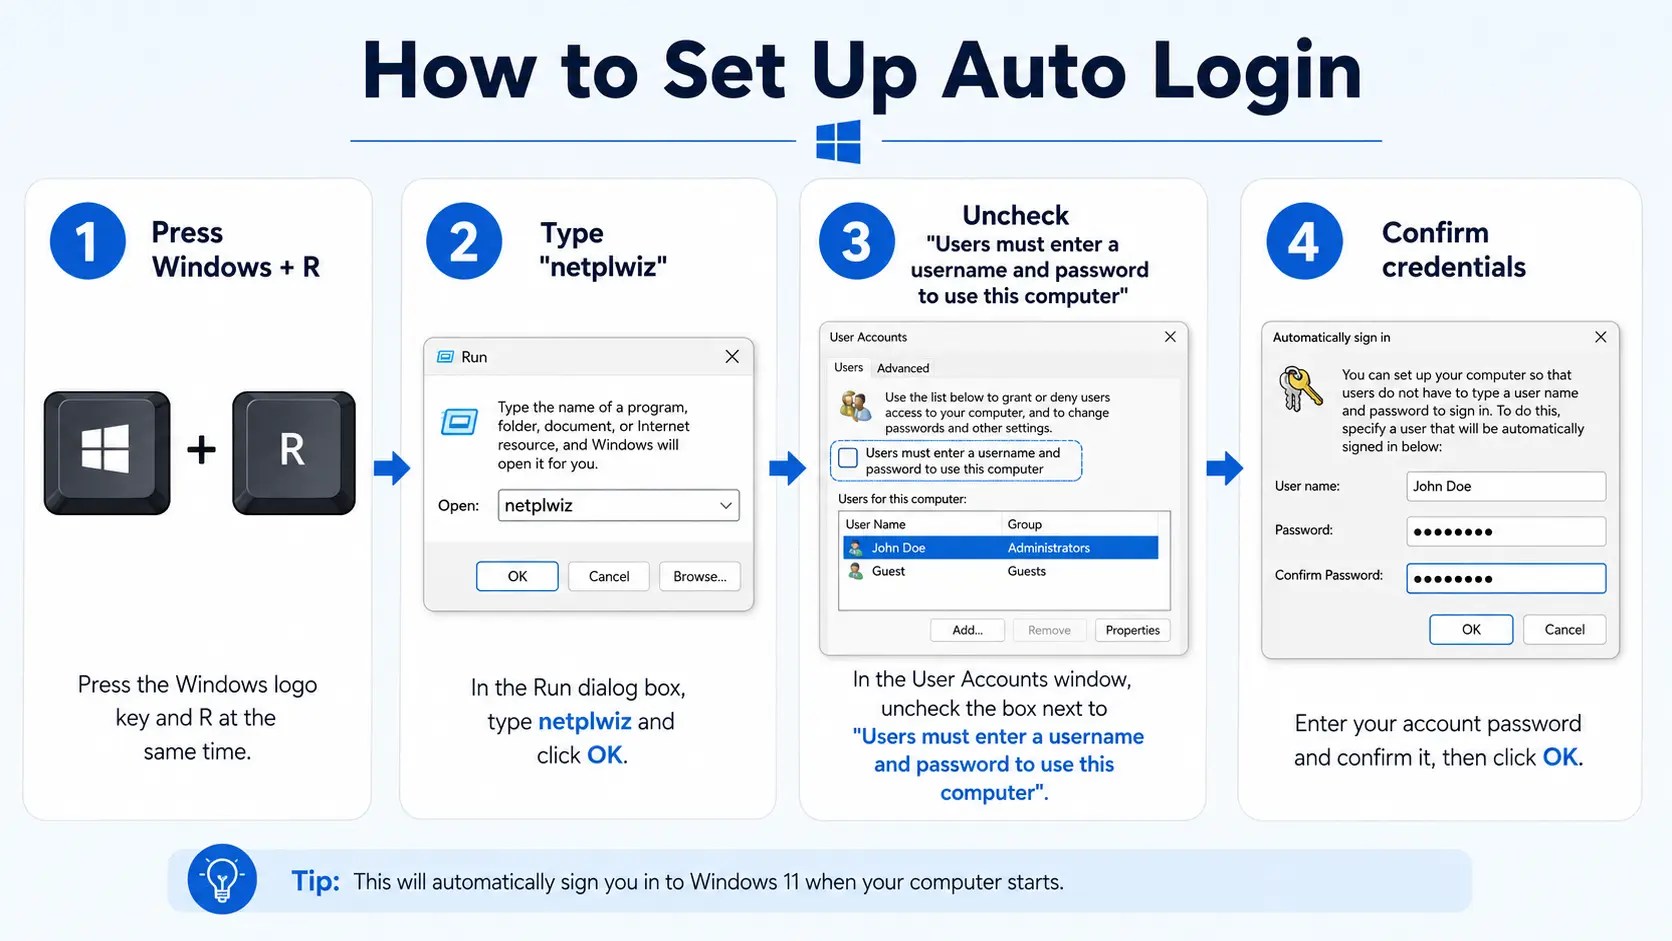
After completing these steps, you’ll be prompted to enter your login credentials once more. This information will automatically be used each time you boot up. Auto-login is ideal for single-user devices or those in secure environments where speed is a priority over stringent security protocols.
However, for shared computers, auto-login might not be wise. Consider the network security implications, and ensure you have a reliable backup plan for account protection. Adjusting these settings often strikes a balance between ease of access and maintaining a robust security posture.
Additional Configurations
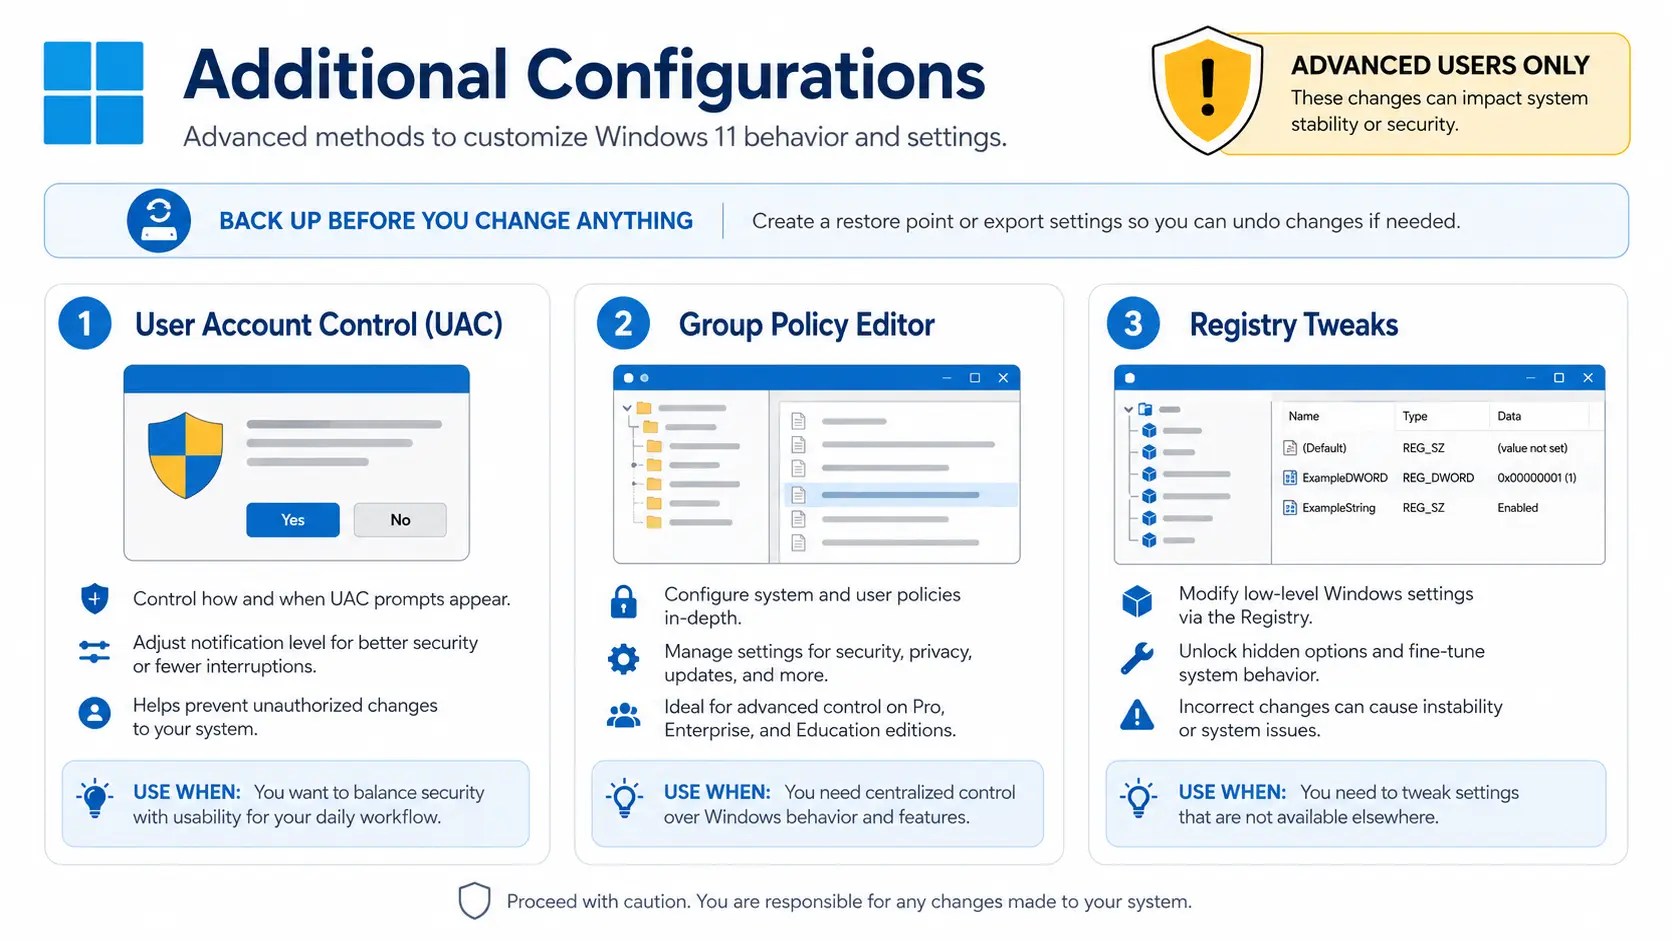
For those seeking further customization, Windows 11 offers a few additional configurations. These options can refine your sign-in experience. While not necessary for everyone, they provide flexibility for advanced users.
Here’s what you can explore:
- Use the Group Policy Editor for detailed changes.
- Implement Registry tweaks for specific needs.
- Explore third-party tools for additional customization.
These methods allow for deeper system control. They are best suited for users familiar with Windows settings. Be cautious, as improper adjustments can affect system stability or security.
Using Group Policy Editor
The Group Policy Editor provides advanced configuration possibilities in Windows 11. It allows for precise management of system behaviors. Ideal for tech-savvy users, this tool enables detailed sign-in option tweaks. Here’s how to access it:
- Press Windows + R and type gpedit.msc.
- Navigate to Computer Configuration > Administrative Templates.
- Explore options under System to manage account policies.
With Group Policy, adjustments are policy-driven and can affect multiple users. This is particularly useful in corporate settings. However, the Group Policy Editor is available only in some Windows 11 editions, notably Pro and Enterprise.
Registry Tweaks for Advanced Users
Registry edits can provide granular control over Windows 11 settings. They enable customization beyond standard GUI options. Caution is critical when using Registry tweaks. Improper changes may result in a malfunctioning system.
To perform a Registry tweak:
- Press Windows + R and enter regedit.
- Navigate through HKEY_LOCAL_MACHINE or HKEY_CURRENT_USER.
- Modify specific values under SOFTWARE\Microsoft\Windows.
Consider backing up the Registry before making any changes. Tweaks can include disabling password prompts or auto-configuring login settings. Familiarity with the Windows Registry is crucial for these tasks. Additionally, note that detailed guides are available for specific tweaks online.
Conclusion
Removing or bypassing the sign-in options in Windows 11 can greatly enhance your user experience. It’s a simple process that suits both personal and shared devices.
By understanding and utilizing these steps, you gain more control over how you access your system. Whether using auto-login, switching to a local account, or employing advanced configuration methods, the flexibility of Windows 11 allows for a seamless login experience without compromising on choice. Always consider the balance between convenience and security to ensure your setup meets your needs.